- Command Line
- Interactive Controls
- Colouring Controls
- Quality Controls
- Sliced Rendering
- Image Metadata
- Tile Assembly
- Zoom Video Encoding
- Tiled Zoom Rendering
- Parameter Files
Command Line
mightymandel [argument]* [filename]
Arguments:

    --help              show this usage message and exit
    --version           show the version string and exit

    --view X Y R        set view coordinates to X + i Y @ R

    --verbose level     set the log message verbosity
                        valid levels (from quiet to noisy) are:
                        fatal error warn notice info debug
    --geometry WxH      set window size (default --size)
    --size WxH          set image size (default --geometry)
    --de                compute distance estimates (default)
    --no-de             don't compute distance estimates
    --no-approx         don't compute series approximation
                        sometimes that optimisation breaks glitch fixing

    --weight W          how dark to make the boundary (default 0.0)
    --glitch            highlight glitches in ugly colours
    --no-glitch         try to mask glitches (default)
    --max-glitch G      percentage of glitches allowed (default 0.02)
                        lower value gives better image at higher cost
    --max-blob B        maximum pixels in glitched blob allowed (default 1)
                        lower value gives better image at higher cost
    --sharpness S       how sharp to make visible interior (default 0.01)
                        lower value gives better image at higher cost
    --timeout T         timeout after T seconds (default infinity)
    --slice S           split calculations into 4^S blocks
                        valid range from 0 (default) to 8

    --interactive       start in interactive mode (default)
    --one-shot          render one image and exit
    --tile N[xM]        render a large image as NxM tiles
                        M defaults to N if it isn't specified
                        final image size is (W*N)x(H*M)
    --zoom F            render a zoom-in sequence of F frames
                        can be combined with --tile
    --overhead          quit after startup without rendering anything
                        might be useful for benchmarking

Only use at most one of: --interactive --one-shot (--tile --zoom)

If a filename argument is given, it will be loaded to set the
viewing parameters.
The old flag names were deprecated in v15, but still work. They will be removed in a future version.
Interactive Controls
Interactive controls are disabled when performing tiled rendering or zoom rendering, to prevent accidentally messing up the output.
Mouse:
- left/right/scroll - zooming (shift, ctrl, shift+ctrl adjust zoom amount)
- middle click - recenter (if you have no middle button try left+right together)
Keyboard:
- ESC, Q - quit
- E - toggle displaying possible glitches shaded red
- S - save image (you might want to wait until rendering is complete)
- 0-9 - change colouring weight (1 is thin, 9 is thick, 0 is thickest)
- PageUp, PageDown - zoom in and out keeping center fixed (shift, ctrl, shift+ctrl adjust zoom amount)
- Left, Right, Up, Down - translate view keeping zoom level fixed (shift, ctrl, shift+ctrl adjust translation amount)
Colouring Controls
Weight
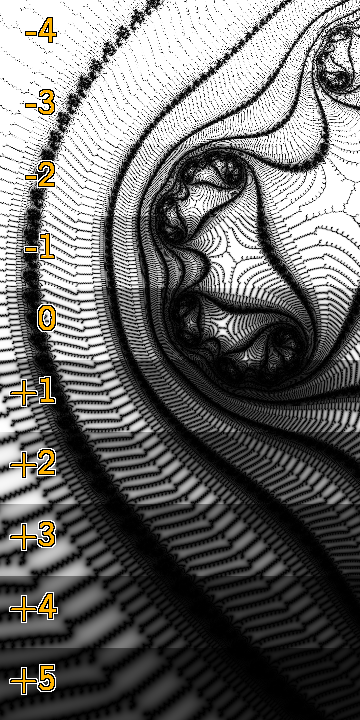
The --weight flag controls how dark the image is, default 0.0. Higher weights make the image darker, lower weights make the image lighter. Low weights can worsen aliasing, especially with --no-de, so for best quality with similar appearance increase both --weight and --size and downscale later.
Here is a comparison of different weight settings:
Quality Controls
Sharpness
mightymandel has no fixed maximum iteration count. Instead it keeps doubling the iteration count until the rate of newly escaping pixels is low. How low is good enough is determined by the --sharpness command line argument. Reducing sharpness increases quality and time. Using fp32-large-minibrot.mm as a test case, here's the effect of reducing sharpness on the time taken:
| sharpness | time | interior | delta |
|---|---|---|---|
| 1 | 1.1 | 84.679796 | n/a |
| 0.1 | 1.1 | 84.679796 | 0 |
| 0.01 | 1.1 | 85.010959 | 3051 |
| 0.001 | 1.7 | 85.312934 | 2783 |
| 0.0001 | 5.5 | 85.316081 | 29 |
| 0.00001 | 18.3 | 85.316189 | 1 |
| 0 | 35.4 | 85.316189 | 0 |
Here time is in seconds and delta is the number of pixels changed relative to the previous line (image size was 1280x720) - over 6x longer for a single pixel when changing from 0.0001 to 0. The effects are even more dramatic at deeper zooms where more iterations are required.
No runtime interactive control for --sharpness yet.
Maximum Glitch Percentage
For deep zooms, mightymandel uses perturbation techniques publicised by K I Martin in his SuperFractalThing program, and further the automatic glitch detection technique invented by Pauldelbrot. See:
- http://superfractalthing.co.nf/
- http://www.fractalforums.com/announcements-and-news/pertubation-theory-glitches-improvement/
When glitches are detected, a new high precision reference point is calculated to try to resolve them. Getting rid of all the glitches can take a while, so mightymandel has a glitch masking option (--no-glitch, enabled by default) which replaces a glitched pixel by the average colour of its non-glitched neighbours. This works well for glitches up to a couple of pixels big.
If the glitches are still too visible (perhaps a couple of small but large glitched areas), try reducing --max-glitch which sets the percentage of pixels that are allowed to be glitched - if fewer glitches than that are present then no more reference points are computed and the image is deemed done.
No runtime interactive control for --max-glitch yet.
Maximum Blob Size
Sometimes the glitched pixel percentage is high, but all of the glitches are tiny so glitch masking would probably do a good job. The --max-blob command line flag sets the maximum size in pixels of glitched blobs to allow, default 1 pixel. Increasing it speeds up image completion, at the cost of larger glitched blobs. Setting it to 0 means --max-glitch only is used into account for image completion testing, as in previous versions.
No runtime interactive control for --max-blob yet.
Sliced Rendering
The --slice option divides the calculations into multiple smaller batches. This reduces video memory requirements allowing huge images to be rendered (see Slicing Comparison), and also provides progressive lofi to hifi image refinement (see Progressive Rendering Comparison) when exploring.
Image Metadata
mightymandel saves PPM with embedded comments containing image metadata. View the one-line summary with:
head -n 2 myfile.ppm | tail -n 1
View the rest by taking lines (after the first) until they don't start with #. Or use a text viewer that doesn't spew pages of binary data to your terminal, I use most.
There is a script in extra that preserves metadata when converting to PNG, use it like this:
./extra/ppm2png.sh *.ppm
To view the metadata in PNG files, you can use identify -verbose from the ImageMagick collection, or alternatively pngmeta is a lot smaller to install and gives more concise output:
$ pngmeta --quiet mightymandel_2015-01-06_17-11-15_0000_00_00.png
Title: -1.540873546715222778362930591e-01 + 1.030622684125921468839299248e+00 i @ 1.05879118407228e-22
Software: mightymandel
mightymandel: version v15-82-g95dc0d8
filename implementation-comparison.mm
view.real -1.540873546715222778362930591e-01
view.imag 1.030622684125921468839299248e+00
view.radius 1.05879118407228e-22
calc.escaperadius 602.833931527923
calc.pixelspacing 2.9410866224230000e-25
calc.fp fp64
calc.perturb yes
calc.perturb.approx yes
calc.perturb.refcount 15
calc.perturb.maxglitch 2.0000000000000000e-02
calc.sharpness 1.0000000000000000e-02
calc.distanceestimate yes
colour.distanceestimate yes
colour.weight 0.0000000000000000e+00
colour.showglitches no
zoom no
tiling no
mightymandel can load some of the metadata from its PPM and converted PNG files.
Tile Assembly
The tile.sh script in extra wraps around mightymandel and when it's done it combines all the tiles into a single large image automatically. Example:
./extra/tile.sh 3x2 examples/mm/mightymandel-initial-view.mm \
./src/mightymandel # followed by any options you want
You might want to change the tile size with the --size option. Square tiles make it easy to change the aspect ratio in the tiling dimensions. Small tiles are less efficient, so make tiles as large as possible so fewer are needed.
The final output PPM doesn't have any metadata.
The script needs the filename to make it absolute, so that when it creates and changes directory into a temporary directory, mightymandel can still find it.
Zoom Video Encoding
You can use mightymandel --zoom output with the zoom assembler in extra, and pipe zoom's y4m output to a video encoder. For example:
make -C extra zoom
mkdir tmp
cd tmp
../src/mightymandel --zoom 100 --size 640x360 ../examples/mm/fpxx.mm
cat *.ppm | ../extra/zoom 640 360 100 60 |
avconv -f yuv4mpegpipe -i - -vb 1M ../fpxx.ogv
The first 3 arguments of zoom are the size and zoom count, the 4th is the desired length of the final video in seconds. Optionally, the 5th argument is the desired frames-per-second, and the 6th argument is the shutter speed for motion blur (ranges from 0.0 (no blur) to 1.0 (full blur), default 0.5).
Working out the correct zoom count for a certain view radius isn't implemented yet.
Tiled Zoom Rendering
You can combine --zoom with --tile, to make large videos or for antialiasing. In particular --no-de can be quite grainy at low --weight, increasing the weight and rendering a larger image before downscaling can give a much smoother image. The procedure for assembling the tiles is slightly different:
mkdir tmp
cd tmp
../src/mightymandel --zoom 100 --tile 7x5 --size 512x512 \
  --de --weight 2 --verbose warn ../examples/mm/fpxx.mm
stem="$(ls | head -n 1 | sed s/_0000_00_00.ppm$//)"
../extra/tile-zoom.sh "${stem}" 7 5 0 100
rm -r junk   # after checking that the output files are ok...
cat *.ppm | ../extra/zoom $(( 7 * 512 )) $(( 5 * 512 )) 100 60 |
avconv -f yuv4mpegpipe -i - -vb 10M ../fpxx.ogv
You might have problems with extra/zoom if you have really huge images: OpenGL has a maximum texture size limit (depends on hardware and drivers). So you might need to downscale your images first. You should get better quality if you downscale after extra/zoom in the avconv command, but you might have to downscale a little both before and after.
Tiled zooming needs a lot of disk space, as all the data is stored uncompressed. For example, --zoom 100 --tile 7x5 --size 512x512 will need:
(100 * 7 * 5 * 512 * 512 * 3) bytes = just over 2.5GB
Moreover the extra/tile-zoom.sh moves all the tiles to junk/, along with the rows of tiles used to make up the final frame, which triples the disk space usage. If you're brave, edit the script to change mv -t junk to rm and hope for the best.
Parameter Files
Supported formats for viewing parameters:
- gif – FractInt output with embedded metadata http://www.nahee.com/spanky/www/fractint/fractint.html
- kfr – Kalles Fraktaler 2 http://www.chillheimer.de/kallesfraktaler/
- mdz – Mandelbrot Deep Zoom http://jwm-art.net/mdz/
- mm – mightymandel http://mightymandel.mathr.co.uk
- par – FractInt (requires preprocessing to ppar first, see FractInt par Files)
- png – mightymandel output with embedded metadata (see Image Metadata)
- ppar – preprocessed FractInt (see FractInt par Files)
- ppm – mightymandel output with embedded metadata (see Image Metadata)
- sft – SuperFractalThing http://superfractalthing.co.nf/
Not all images will be correct – mightymandel doesn't support some things the others do like rotation or stretching. And the colouring will be different too. mightymandel just extracts the view center and radius, if possible.
FractInt par Files
You can preprocess FractInt parameter files with the split2ppar.sh script in extra, and load the .ppar in mightymandel. For example:
./extra/split2ppar.sh /path/to/my-fractint-files/*
for ppar in split2ppar.*/*.ppar
do
  ./src/mightymandel --one-shot "${ppar}"
done
Native FractInt parameter file support in mightymandel is on the TODO list.